
ZenGrove
Grow a plant, one node at a time.
Grow a plant, one node at a time.
Explore all 44 nodes with illustrated Maya views and plain-English explanations of every setting. Build trunks and branches, place foliage, shape growth, add wind and prepare your output.
Build a plant by connecting a few nodes, then refine each part. The reference below shows every available node and its settings in Maya. Updated for ZenGrove 1.0.0-alpha.10.
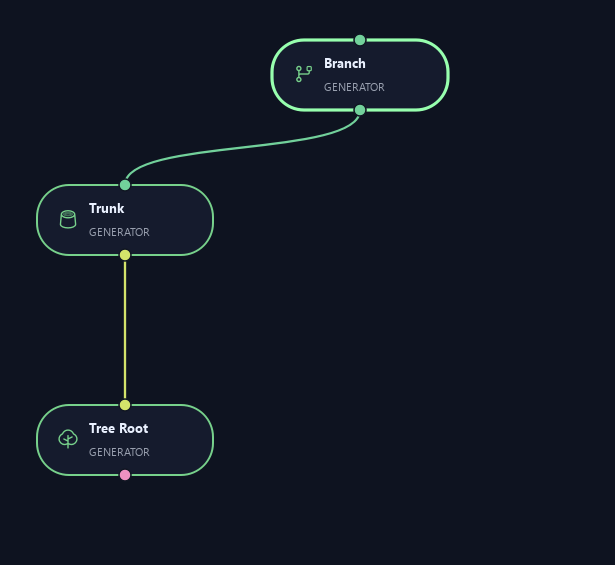
- Start with Tree Root → Trunk → Branch. Add Twigs for a finer layer.
- Capture leaf meshes with Asset Collection and connect them to Leaves along with the branch structure.
- Connect structure and foliage to Output. Use Build Preview while shaping, then Build High for the detailed result.
- Add Dynamics for motion, or start from an existing modeled trunk with Mesh Trunk.
Working in the node editor
Add a node, continue from an existing one, or move a group of connections in one gesture. Open a workflow below for the steps and views from ZenGrove in Maya.
The small circles on a node are its connection points, called sockets. In the usual bottom-to-top layout, inputs sit at the bottom and outputs at the top.
Add NodeSearch and browse the node library
- Click Add Node in the top toolbar.
- Type a name in Search nodes…, or browse a category.
- Click a node once to add it. You can also use the arrow keys and Enter in the search field.
The palette stays open, so you can add several nodes. Click Add Node again or press Esc to close it.
Use your selection: selecting a node first can attach the new node to it when the connections fit. Click empty graph space to clear the selection when you want to place nodes separately. Some generators can also find a suitable source already in the graph.
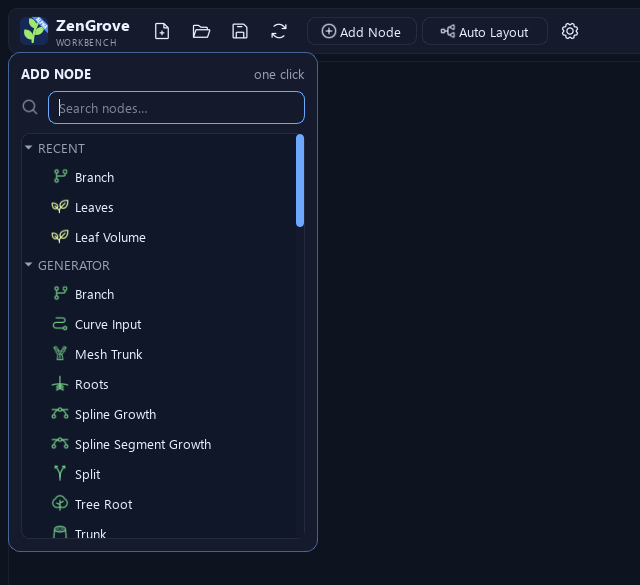
Right-clickAdd a node from the canvas menu
- Right-click an empty part of the graph.
- Open a category such as Generator, Modifier or Utilities.
- Click the node you want. For example, choose Generator → Branch.
The click position is the starting point for the new node. If it connects to a selected node or a suitable source, ZenGrove may rearrange the connected graph.
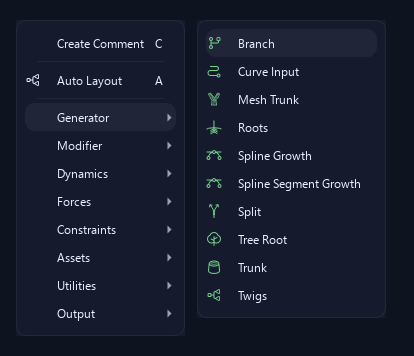
Drag into empty spaceCreate and connect in one go
- Left-click and hold an output socket, then drag out a wire.
- Release over empty space inside the graph. Leave the pointer clear of nodes, existing wires and comment frames.
- Choose a node from the search. ZenGrove shows nodes that can use this output, then creates your choice at the release point and connects it automatically.
If the chosen node offers several suitable inputs and has no preferred one, choose an input from Connect To. Press Esc or click outside the search to cancel. Ctrl + Z undoes the new node and its connection together.
Start this gesture from an output without holding Ctrl. Dragging from an input into empty space does not open the node search.
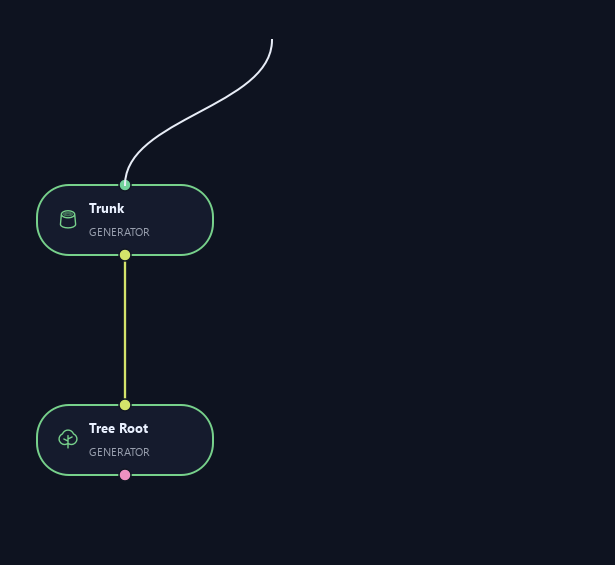
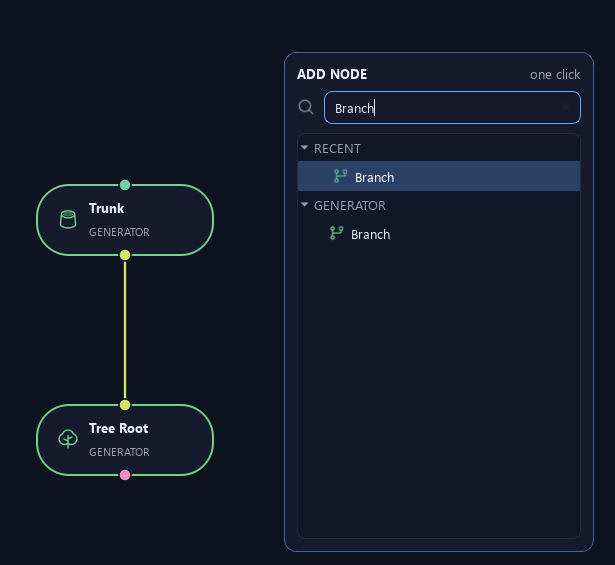
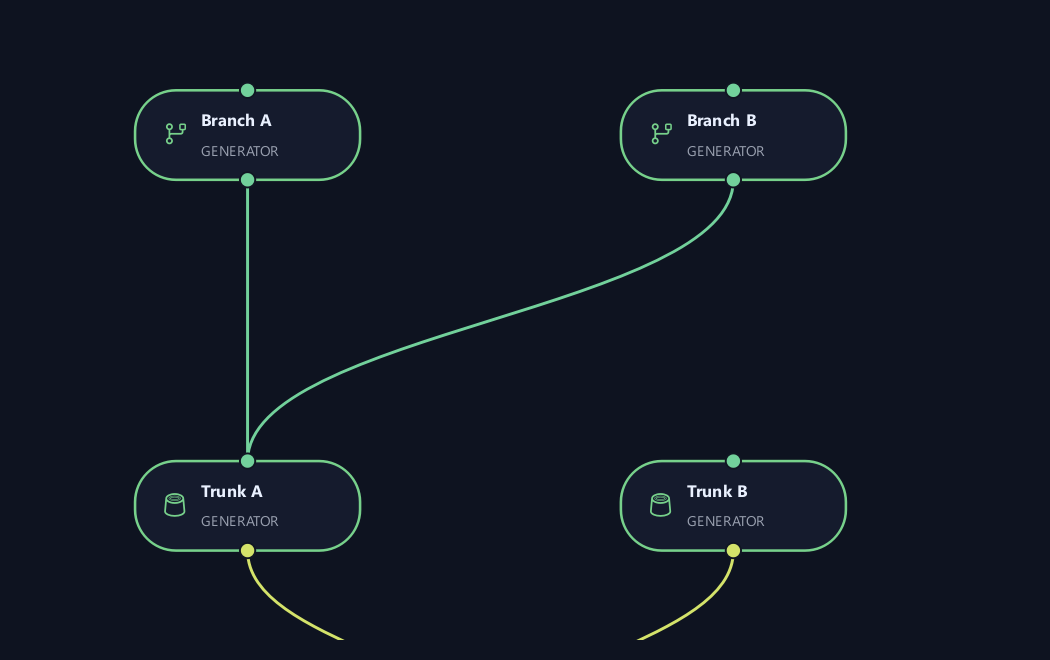
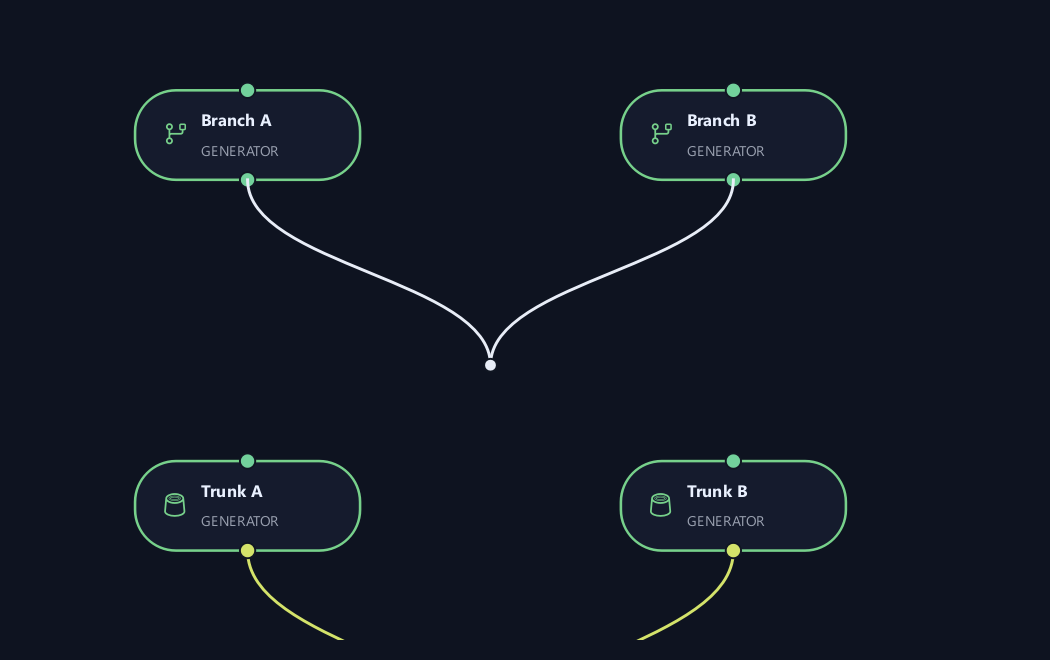
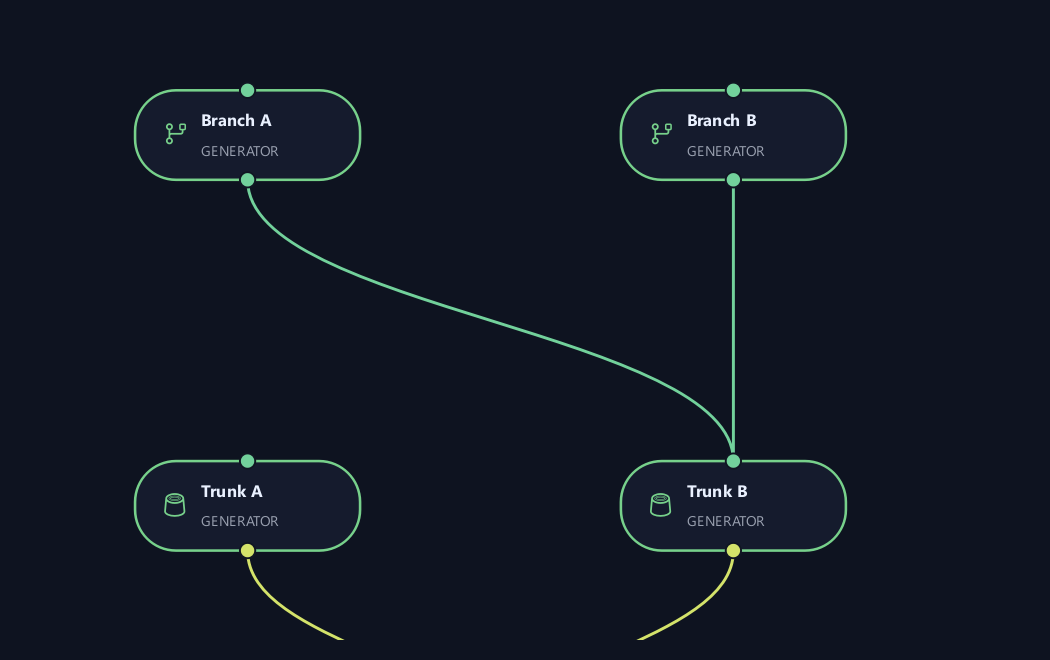
Ctrl + dragReroute existing connections
- Hold Ctrl, then left-click and hold a socket that already has connections.
- Drag to another compatible socket of the same kind: output to output, or input to input.
- Release to move the existing connections together. Their other ends stay connected.
For example, move the output of Trunk A to the output of Trunk B. Both Branch A and Branch B then receive their structure from Trunk B.
Cancel safely: release over empty space to keep the original connections. An incompatible move also leaves them in place. Moving onto a single-input socket that is already connected replaces its old connection.
To tidy the path of a wire with a movable point, add a Reroute Knot from Utilities. The knot guides the wire without changing what passes through it.
Reading the controls
A parent is the branch that new growth attaches to. Start and End select a region along it: 0% is the base and 100% is the tip. Some ratio fields use decimals, so 0.5 means half.
For profile curves, click to add a point, drag to reshape and right-click a point to remove it. Linear makes straight transitions; Bezier adds smooth handles. Each profile's explanation tells you what its horizontal axis represents.
Type a number and confirm it to adjust beyond a slider's current range where the setting allows it. The slider recenters around that value. Percentage ranges, positive sizes and other meaningful limits still apply. Scrolling the settings panel does not change an unfocused number field.
The reset arrow restores one setting to its default. Advanced parameters opens less frequently used settings. A seed gives repeatable variation. Some controls appear only after selecting a mode; their pages show those additional views too.
All 44 nodes
Branch
Adds a new layer of branches to the incoming stems. Choose how many appear, where they appear and how their angle, length and thickness vary along the parent.
View node and settings →
Curve Input
Collects Maya curves as growth guides. Capture your drawn silhouette, then connect Spline Growth or Spline Segment Growth.
View node and settings →
Mesh Trunk
Uses an existing Maya trunk mesh as the starting structure for procedural branches and foliage. ZenGrove finds paths inside it while preserving the imported mesh's shape.
View node and settings →
Roots
Adds roots with a broad transition into the lower trunk. Its collar controls help the base spread naturally into the ground.
View node and settings →
Spline Growth
Grows tube branches along captured curves. Use it to draw a trunk, vine or branch by hand while keeping the rest of the plant procedural.
View node and settings →
Spline Segment Growth
Repeats your own mesh segments along captured curves. Each piece follows a span of the guide; the source mesh is not continuously bent along the whole curve.
View node and settings →
Split
Divides a growth path into two continuing paths. Shape forked trunks and branches with controls for the opening and the surface where both sides meet.
View node and settings →
Tree Root
Sets the name, overall size and starting positions of your trees. Place whole trees at a point, on a grid, around a ring or across an area; the connected Trunk node adds its own stems at every origin.
View node and settings →
Trunk
Creates the main stems. Arrange them at a point, on a grid, around a ring or across an area, then shape their height, lean and thickness.
View node and settings →
Twigs
Adds smaller branches to the current branch layer. Use its size profiles to vary twig size from the base toward the tips.
View node and settings →
Bend
Bends existing branches toward a chosen direction while keeping their attachments in place.
View node and settings →
Contact Hull
Cuts growth where it meets a captured hull surface. Choose a blunt cut or a tapered contact tip.
View node and settings →
Curl
Shapes branch tips into tightening or opening spirals. Control turns, inner and outer radius, sideways depth and variation between branches.
View node and settings →
Foliage Normals
Softens foliage shading using surface directions from a canopy-shaped proxy mesh. It helps individual leaf cards read as a fuller crown in High-quality builds.
View node and settings →
LOD
Creates progressively lighter plant versions. Reduce branches, twigs, foliage and mesh detail independently for different viewing distances.
View node and settings →
Length Randomize
Gives branches different lengths while keeping their attachments. Use it to break up a crown that looks too uniform.
View node and settings →
Noise
Adds irregular bends along branches. Low values break up straight shapes; stronger values create a more twisted silhouette.
View node and settings →
Prune
Removes whole branches that are too short, too long or too thin.
View node and settings →
Radius Profile
Shapes thickness with an editable curve. Create a flared base, a swollen middle or a fine tip.
View node and settings →
Resolution
Controls mesh detail around and along branches. Set an even edge size or choose fixed counts.
View node and settings →
Sag
Makes branches droop toward the ground. The bend increases away from the attachment for a heavier appearance.
View node and settings →
Smooth
Softens abrupt changes in a branch path. Use it after strong shaping operations when the result looks too angular.
View node and settings →
Taper
Changes branch thickness from base to tip. Adjust the two ends and the transition between them.
View node and settings →
Trim
Cuts branch ends to a chosen length or percentage. Use it for a clipped crown or more even branch lengths.
View node and settings →
Twist
Twists the branch shape around its original growth direction, giving a flat silhouette more depth.
View node and settings →
UV Mapping
Controls how bark textures wrap around branch tubes, including repeats, seams and end-cap UVs.
View node and settings →
Vertex Color
Writes masks into red, green, blue and alpha vertex-color channels for shader wind, variation and other effects.
View node and settings →
Gravity Force
Steers growth relative to gravity. Natural mode sends shoots against gravity and roots with it.
View node and settings →
Linear Force
Steers growth toward a world-space direction, for a preferred growing direction or a wind-shaped silhouette.
View node and settings →
Point Force
Pulls growth toward a Maya object or pushes it away. Move the target to guide branches or open a gap in the crown.
View node and settings →
Vortex Force
Steers growth around a Maya target's axis. Add inward pull or movement along the axis for coils and spirals.
View node and settings →
Collision
Steers the current branch shape around Maya meshes. Use it after shaping nodes, leave a surface gap, or attract growth along an obstacle for vines and ivy.
View node and settings →
Self Collision
Helps branches avoid each other or another connected branch structure. Natural attachment areas are excluded so branches can still join their parents.
View node and settings →
Dynamics
Adds wind-driven motion as Maya's timeline changes. Control broad sway, gusts and leaf flutter, and choose which parts respond.
View node and settings →
Asset Collection
Collects Maya meshes for leaves, fruit, flowers or repeated stem pieces. Give each asset a weight and scale, then connect a placement node.
View node and settings →
Asset Scatter
Places meshes from an Asset Collection along branches, with controls for position, rotation and scale.
View node and settings →
Leaf Volume
Places leaves on branch regions inside a closed volume mesh. Leaves stay attached to those branches, with optional overlap avoidance for static builds.
View node and settings →
Leaves
Attaches leaf meshes to branches. Arrange patterns, adjust orientation, add droop and optionally reduce overlapping leaves in a static build.
View node and settings →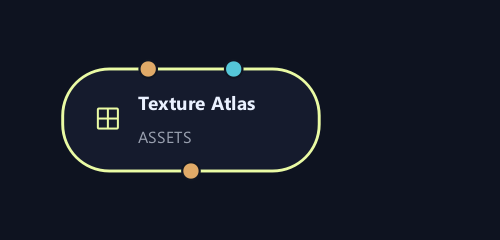
Texture Atlas
Combines asset textures into shared sheets. Connect it to Game Output to remap foliage UVs for export.
View node and settings →
Tree Materials
Sets bark, cut-end and foliage materials, plus transparency and normal-map choices for delivery.
View node and settings →
Volume Scatter
Places assets inside or on a captured hull mesh. Use the hull as a volume for a full crown or a surface for repeated details.
View node and settings →
Game Output
Prepares geometry, textures and optional LODs for export. Connect Texture Atlas for shared foliage sheets and packed maps.
View node and settings →
Output
Builds connected structure and foliage as Maya geometry. Choose final mesh detail and lighter preview settings.
View node and settings →
Reroute Knot
Adds a small knot to guide a connection around the graph. It passes data through unchanged and has no settings.
View node and settings →No matching nodes. Try a different node or setting name.
What is ZenGrove used for?
Explore all 44 nodes with illustrated Maya views and plain-English explanations of every setting. Build trunks and branches, place foliage, shape growth, add wind and prepare your output.
Which host application does ZenGrove support?
ZenGrove is built for Autodesk Maya and is distributed through AO Studio Tools.
Where can I download ZenGrove?
Download the current AO Studio Tools package from https://aostudio.tools/getthetools.html and install it through AO.Hub.